Grain Size
ASTM E-112, E-930, E1181, ISO 643-03, JIS G 0551-05 BS 490 DIN 643-03, IS-4748-88, SIS 111101 GOST 5639-82. Determine feritic and austerritic grain size in steel. The available methods are: 1. Automatic lineal heyn intercept method.2. Jeffries planimetric method. 3. Automatic and Semiautomatic Snyder and graff open scale intercept method. 4. Comparison method. 5. ALA grain size. 6. Selected grain size. 7. Manual count etc.
Phase Segmentation
Segmentation module in a sample measures the volume percentage of phases in a fully automatic way and is associated to a knew constitute of the specimen. Since a phase is detected and its area is estimated on the basis of its intensity/grayscale, an option for delineating phases from the histogram is also provided multiple phases are identified by colored overlays and can be simultaneously displayed for the same field of view. The area percentage data for each phase are displayed in class table. You can process and measures the unlimited number of images and all statistical data (area) will be accumulated in the class table.
Non-Metallic Graphite
ASTM E-1245 E ASTM E45-97, ISO 4163-82, DIN 50602.Wizard determines contents of non metallic. Inclusion in rolled or forged steel products. According to ASTM, expression of results are in group A, b,C,D along with segmentation of thick/thin and its severity level.
Decarburization
ASTM E1077, ISO 3887, JIS-0557-98 BS-6617,IS-7754 DIN 50192.Decarburization module intended to measure decarburized depth of steel due to heating at elevated temperatures during hot working or by detecting changes in the microstructure, hardness or carbon content at the surface. The decarburized depth is taken as the depth where a uniform microstructure, hardness or carbon content at the base material is observed. The microscope image analysis system is accurate for-as hot rolled, as forged, as annealed and as normalized sample. The software performs interactive measurement of complete, partial or total decarburization conforming to industry standards.
Lamellar Graphite
Lamellar Graphite module is simple and straight forward. You need only to describe the sample and taken and the image of the sample rest is supported by powerful and complex image analysis algorithms. This modules evaluate and quantity in a fully automatic and consistent way FORM (Designated by roman no l to Val), size (Designated by Arabic no 1 to8) & type A to Either Graphite is determined at a magnification of 100 and recommended area size is 80mm.Result and images may be displayed and stored in either the industry standards Microsoft access database, where search facility can quickly find the results of a particular analysis using unique information such as customer, specimen type, data, operator etc.
Porosity ASTM 247
Pores in casting are estimated and reported on the basis of intensity. The percentage is calculated.
Spheroidal Graphite
Spheroidal Graphite (Nodules) in cast iron are analysed by identifying the appropriate industry standards. The software determines proportion of graphite of non-round shape, for instance vermicular graphite. Nodules for (designated by Arabic no 1to 8) is reported along with calculated Nodules/sqmm.Artifact can be recognized and ignored. Following graphite measurement and classification, the software presents the result in both graphical and statistical formats. The full morphological analysis raw data is also displayed. Result and images may be displayed and stored in either the industry standard Microsoft access database format, or in an integrated database along with unique information such as customer, specimen type, data, operator etc.
Coating Thickness
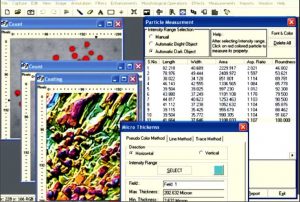
The test method covers measurement of the local thickness of metal and oxide coatings by microscopical examination of cross section.













Reviews
There are no reviews yet.